3 Tips For Making a Popular Open Source Project in 2025 [Ultimate Guide]

![3 Tips For Making a Popular Open Source Project in 2025 [Ultimate Guide]](https://images.unsplash.com/photo-1658037123931-7f384d639e37?crop=entropy&cs=tinysrgb&fit=max&fm=jpg&ixid=MnwxMTc3M3wwfDF8YWxsfDE5fHx8fHx8Mnx8MTY1ODA0NzAyOQ&ixlib=rb-1.2.1&q=80&w=2000)
Introduction
I have around ~50k GitHub stars. I’ve come up with a bullet-pointed actionable list of how to make open-source projects popular.
One of the projects I created had 67 lines of code and had only existed for 3 days before it hit 1.7k stars.
Humans are predictable creatures when it comes to our attention. I’ll show you data-backed actionable insights that can help you create popular software.
Why Bother? Popular Projects = More Contributors = Better Project
What’s the point in getting more GitHub stars? They mean nothing. You can’t buy a coffee with exposure. If GitHub dies, so do the stars.
The problem with open source is the network effect. The more people that find your project, the more people that use it, the more that contribute to it and thus the better it becomes.
The better the project, the more popular it becomes. It’s a self-fulfilling cycle.
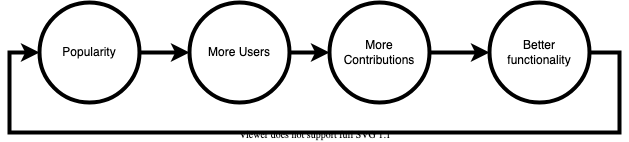
As this cycle continues, it becomes harder for it to continue. That’s a blog post for another day. But first, let’s talk about where we start.
To start us on this cycle we need popularity.
To get contributors to your project it has to be popular enough so people see it and contribute.
Creating a popular open-source project isn’t just a want but a need.
If a project has contributors but no popularity, it’s likely created by a company for internal use and was open-sourced.
Otherwise, only popular open-source projects have contributors.
Well Designed README
README.md is the first thing anyone sees. Make sure to catch their eyes right away.
It’s harder to gain traction based purely on the merit of the tool rather than on the presentation of the tool.
A well-designed README answers these questions succinctly:
- What does this do?
- Does it solve my problem?
- Does it solve my problem better than the competitors (if they exist) do?
- How do I install it?
- What are the basic commands I need to know?
- Where can I go for more help?
This is how a README answers these questions.
We’ll go through each of these.
Create a Header Summarising Your Project
The first thing they see is your README. The first thing they see on the README is the header. Make it good.
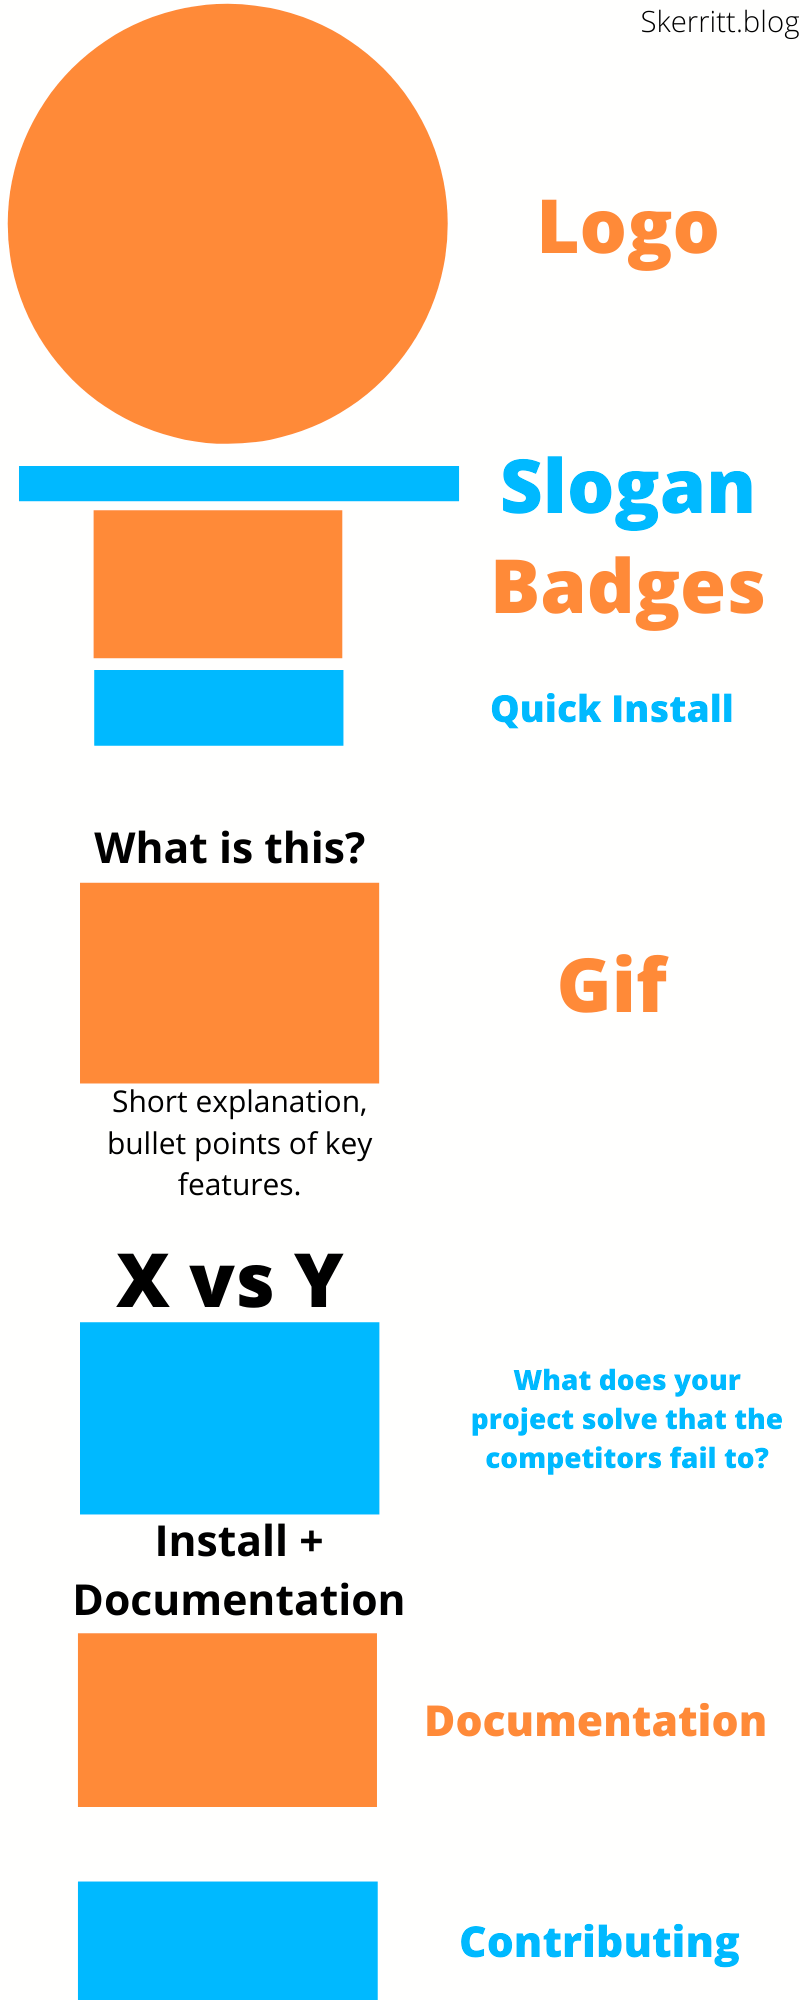
The header is the combination of:
- Logo
- Slogan (short description)
- Badges
- Quick Install
- Quick Links (not always needed)
Beautiful Logo as simple as Canva.com
The logo is the first thing users see and is the image used for social media sharing. When I first create a project, I’ll use something from Canva.
Canva allows you to quickly create a logo from a template for free.
Go to Canva and search for “Logo”
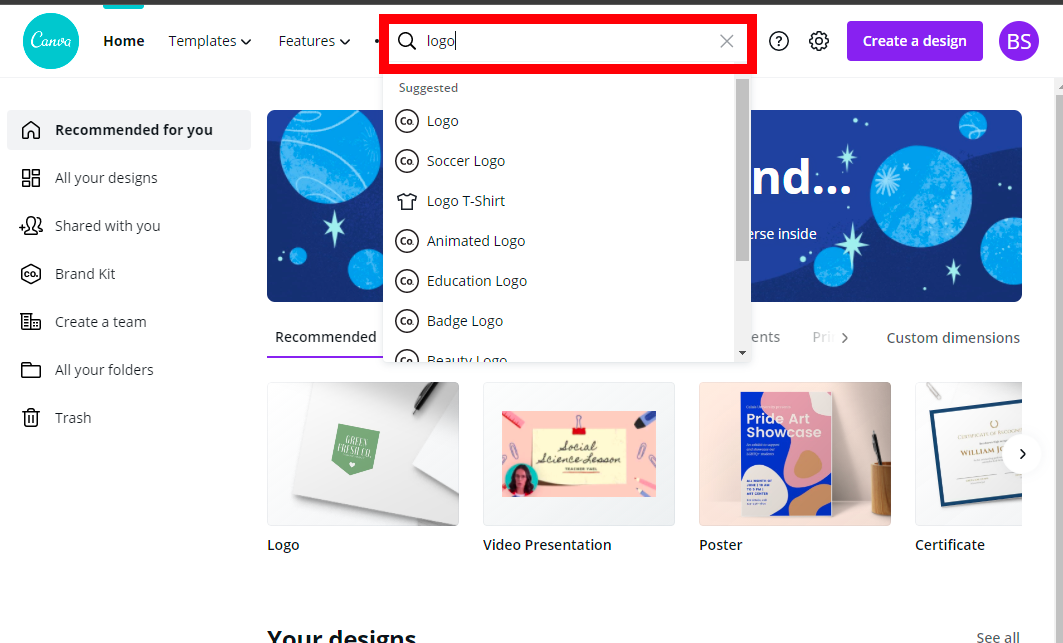
And then just select one of the many logos you come across. Edit it if you want.
Typically, there are 2 things I look for in a logo:
- Coolness factor 😎
- Slogan
I should look at the logo and think ”wow, that’s cool”.

It’s a gif! Isn’t that cool? I made it on Canva in about ~45 seconds. ~30 seconds were spent searching for it!
Secondly, the slogan. The first thing people see will be the logo which contains the name and slogan, instantly they will know what the project is about.
For some of my larger projects, I hire a designer, specifically Varg. Designers are great! Especially ones that can understand the project at hand, which aids in creating a well-conceived logo.
In short: don’t spend too long picking a logo. If you’re not hiring a designer, perhaps ~5 minutes playing around on Canva.
Slogan (description) of your project in 1 simple line
When thinking about the design of your project, think about how people found it. There are 2 major ways people can find your project:
- Someone recommends it to them.
- It’s posted on Twitter / HackerNews / LinkedIn / other social media or news aggregators.
When someone recommends something it’s because that something solves their problem. This means that they already have an idea of how this project solves their problem, of what the project does.
When posted, Twitter will make a social card for it. This card is the title, description, and image.
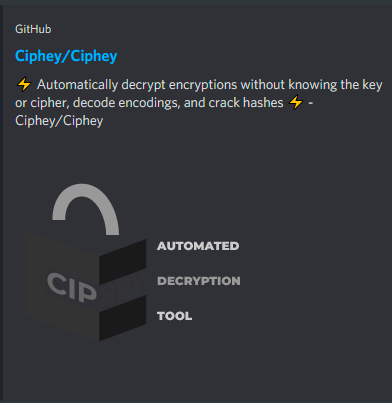
Both of the main methods of sharing your project include a description already. This means 2 things:
- We don’t need to spend time describing what our project is in the
README. - GitHub’s Description will be used everywhere and is the first thing people see.
One sentence or two will be adequate to explain our project in the README.
This is why I include the quick install section in the README. Users who come to your project already have an idea of what it is. Since they do, provide a way for them to quickly install it and try it out for themselves.
“Talk is cheap. Show me the code.” - Linus Torvalds
Good descriptions are hard to write. Very hard.
It needs to:
- Describe the project.
- Be eye-catching.
- Show why the user needs it.
- Show why it’s better than the rest.
- Be easy enough for someone that only knows the subject matter in passing to understand.
This is copywriting. It’s an important skill to learn as copywriting is:
Writing in such a way to convince someone to do something.
My favourite resource is Brian Dean’s Copywriting Guide.
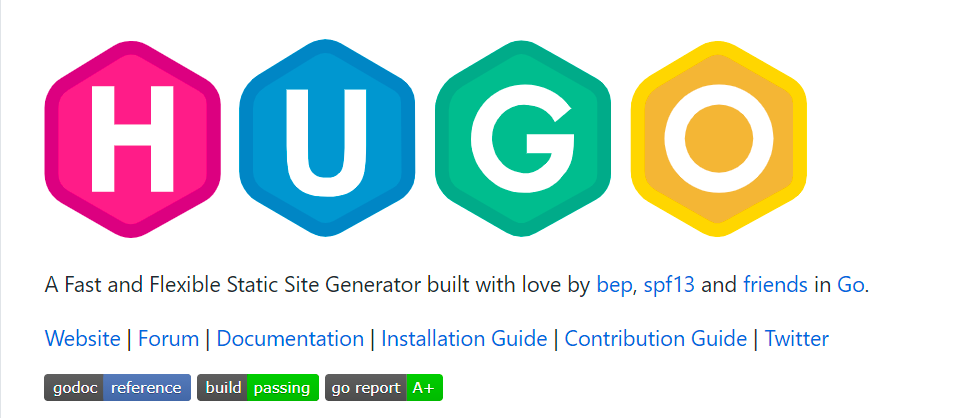
 gohugoio
The world’s fastest framework for building websites.
This explains what the project is well. It is:
- Succinct.
- Answers the question “Why are you better than the rest?” with ”world’s fastest”.
- Answers what it does, ”framework for building websites.”
- Easy enough to understand for non-experts, ”building websites”.
- Uses eye-catching words such as ”worlds largest” and the succinctness imply “we can read this, it’ll only take a second of our time to process this.”
You should spend a few weeks experimenting with the description on-and-off.
Come up with many descriptions, about ~20. And continually improve upon it. When you lie down in bed, think ”If I had never seen my project before, what would I want to see to make me use it?”.
The description is the hardest, but most important part of the whole design. It’s the first thing people see. Invest time into this. Learn copywriting. Even when you think it’s perfect, it can always be improved.
Ask your users what they think of it. Iterate until you can no longer iterate.
Badges
Badges are links/images that sum up the project.

They explain where to find documentation, is the current branch stable? How clean is the code?

How active is the project? How many downloads? The license? Any chatrooms? Mostly, badges are just cool stickers you can include. I like reading them, but some people may not. You can find a list of badges on shields.io.
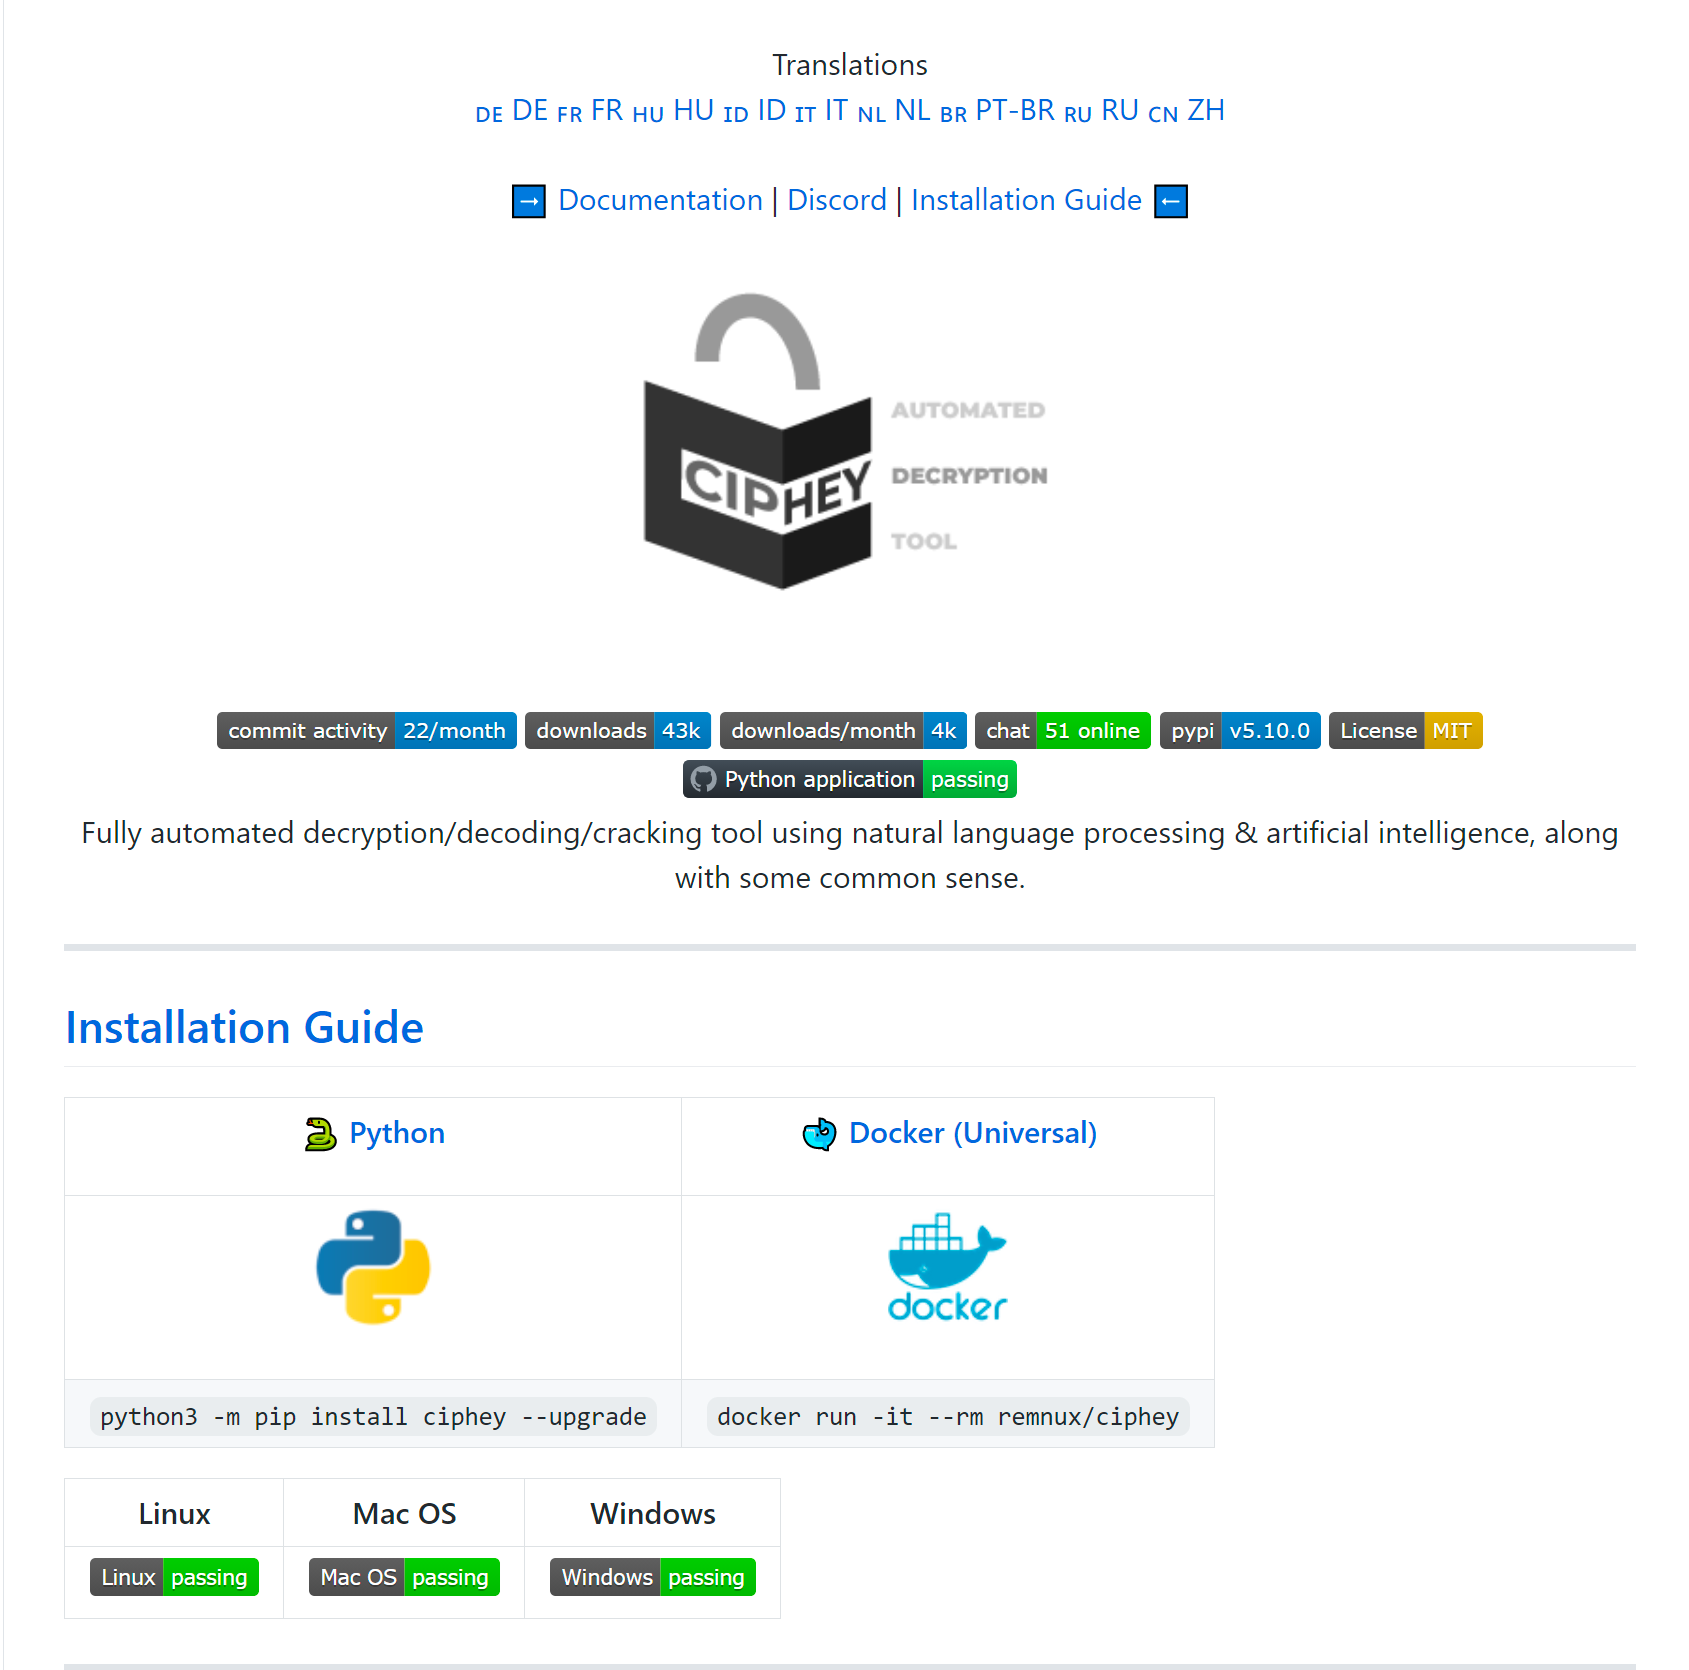
Quick Installation guide
The user understands what the application does from seeing it in the social cards or being told by a friend.
Sometimes, they want to install it as fast as possible to play around.
“Talk is cheap, show me the code.” - Linus Torvalds
The quick install guide allows users to install the software immediately.
|
|
python3 -m pip install ciphey --upgrade | docker run -it --rm remnux/ciphey |


Users do not need to scour the README for information on installation if they are already knowledgeable and want to use the project.
The style above is clean. The package manager’s name, the logo of the operating system and a short installation to copy/paste.
Quick Links
This isn’t required in all READMEs.
Linking to all the resources the user needs in one neat place allows the user to quickly understand anything they want.

The order of these matters. As the user reads left-to-right (assuming English README), the further away items are the less likely they will see it. You want them to see your Twitter first? Include that at the first item.
While this is a flat list separated by pipes, it is an ordered list in the sense that users will only read so far.
I include my quick links at the top of the page, above the fold (the logo).
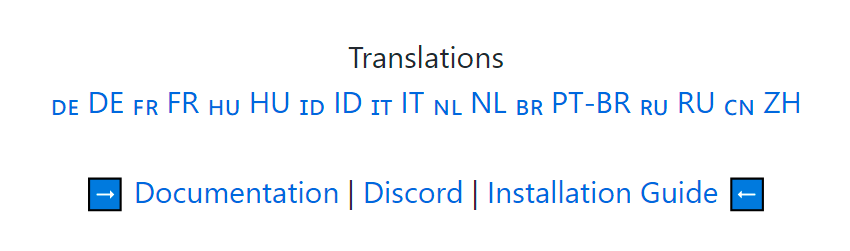
The user will already have a rough idea of what the project is. They may only want 3 things from the README:
- Documentation.
- Support (the Discord link).
- The Installation Guide.
By being at the top, we reduce the friction of finding them.
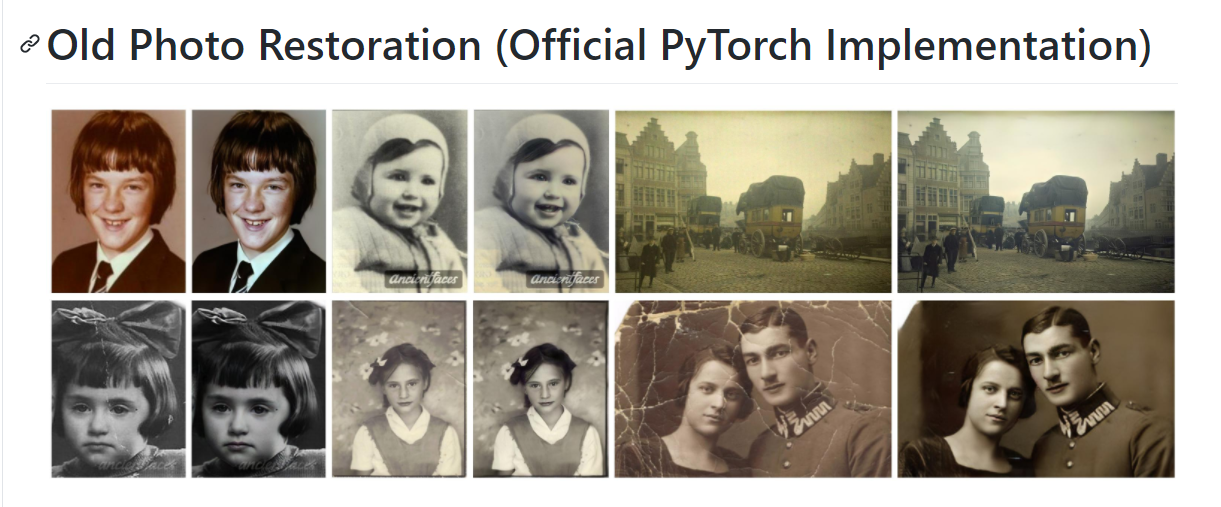
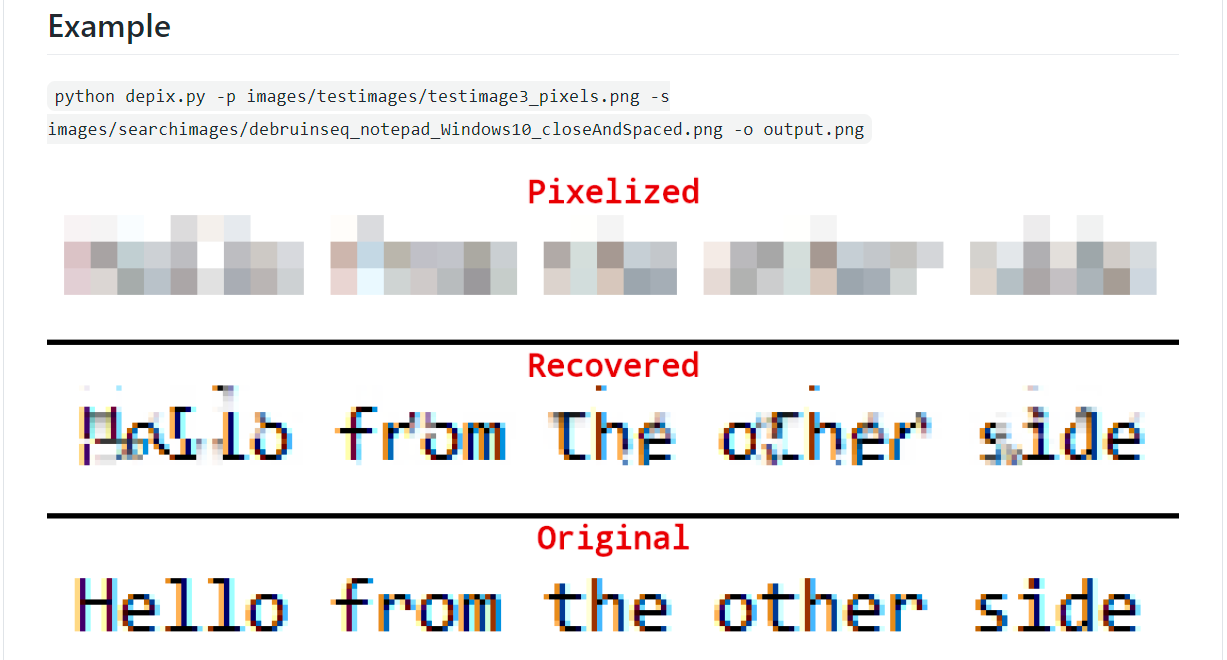
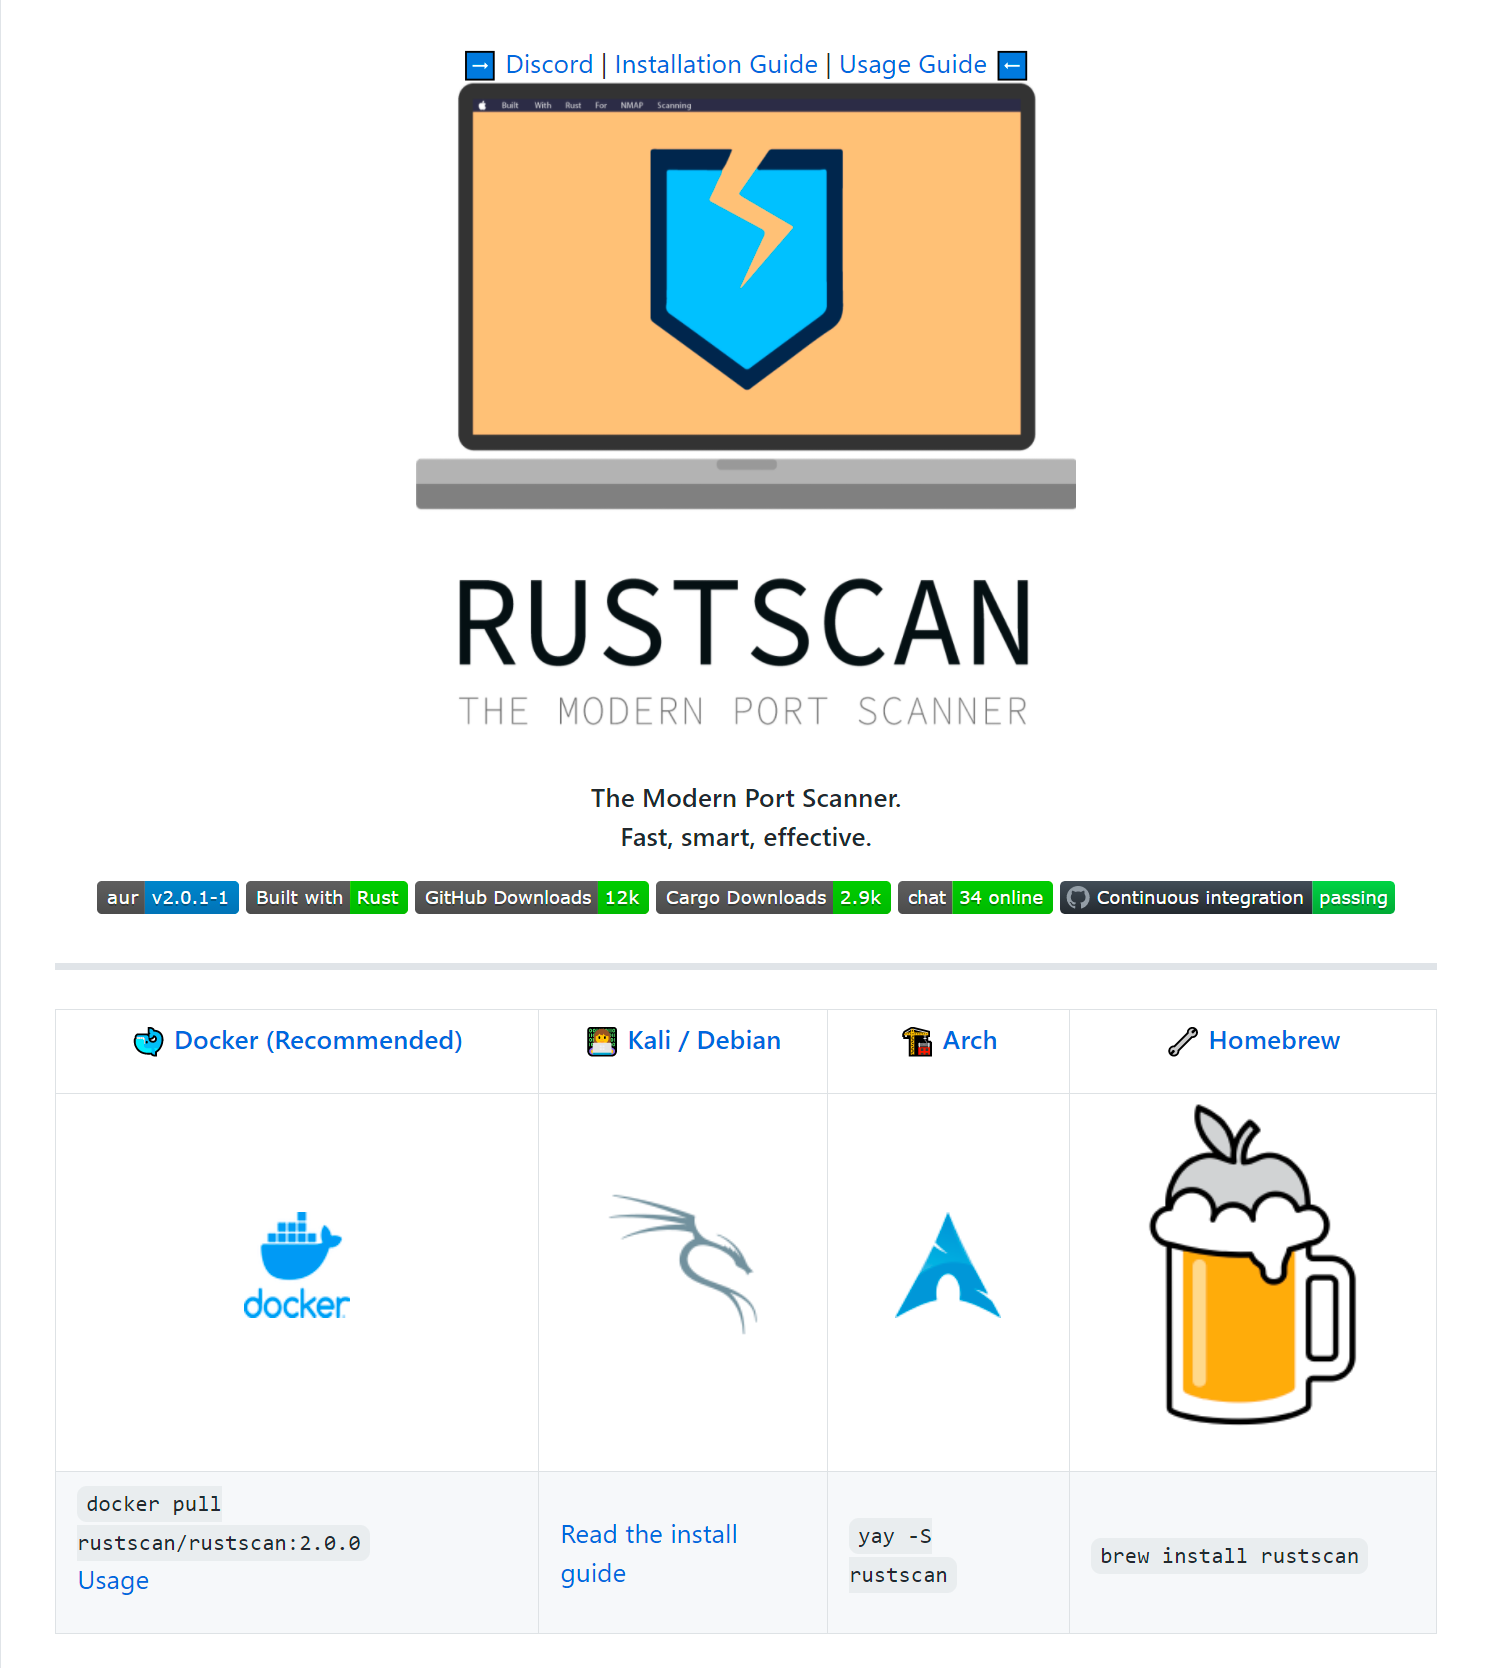
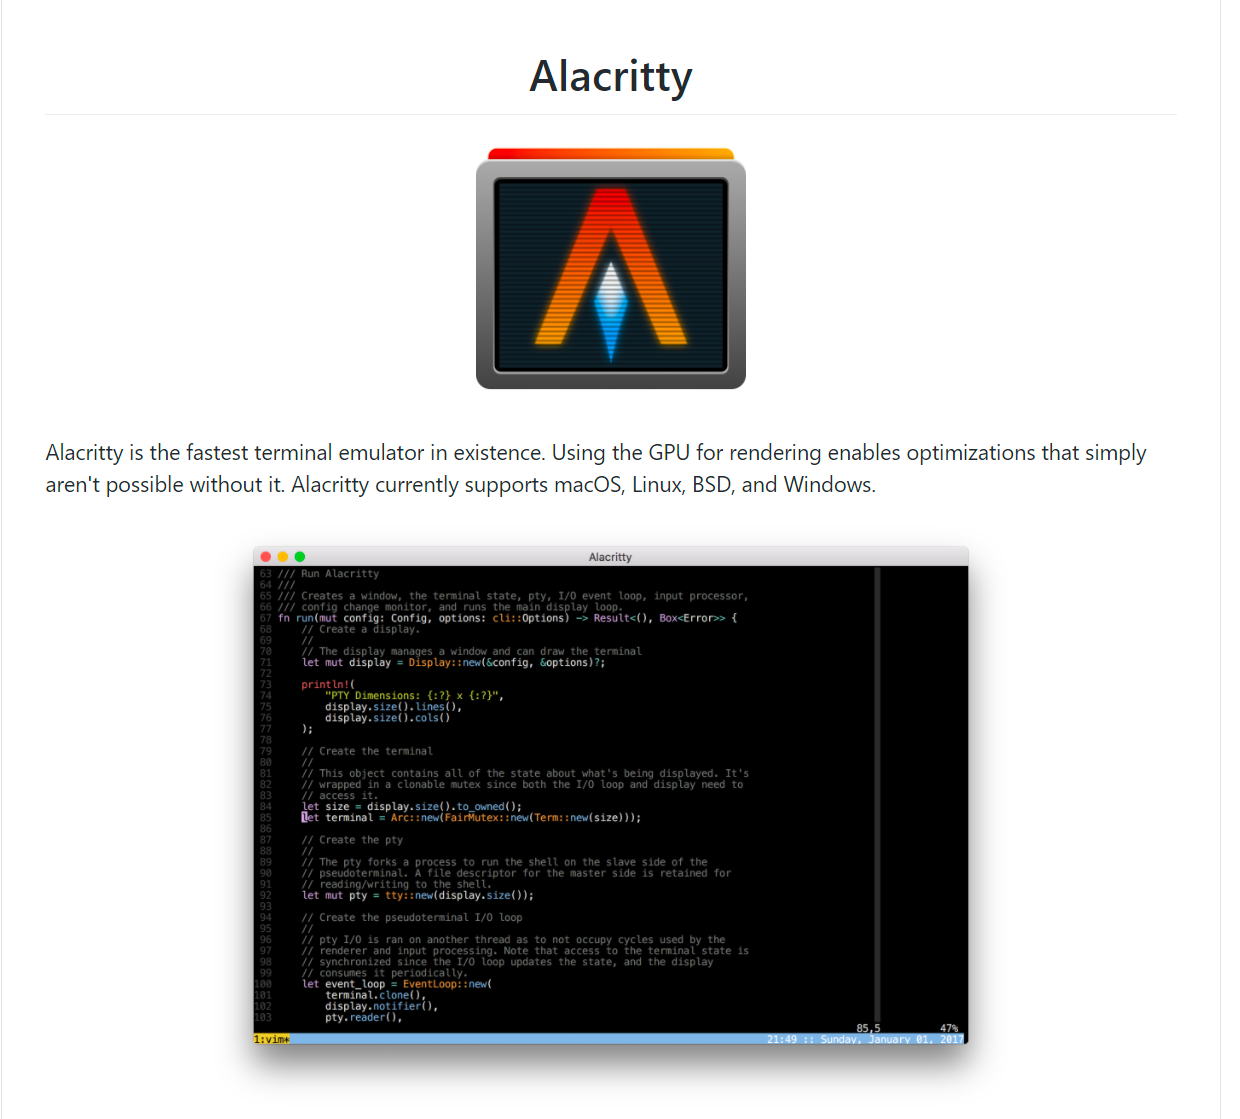
Example Images to show off your project
The header is also a great place to show how your project works. You can use gifs (discussed later in more depth) or images.
This depends on your project, but having images in your header may make sense.
Inspiration for designing your header Let’s look at some inspiration
What Is This? Describing Your Project Succinctly.
This section explains the features of your product.
Short explanations. A gif that demonstrates your project. Essential features you think someone would want to see.
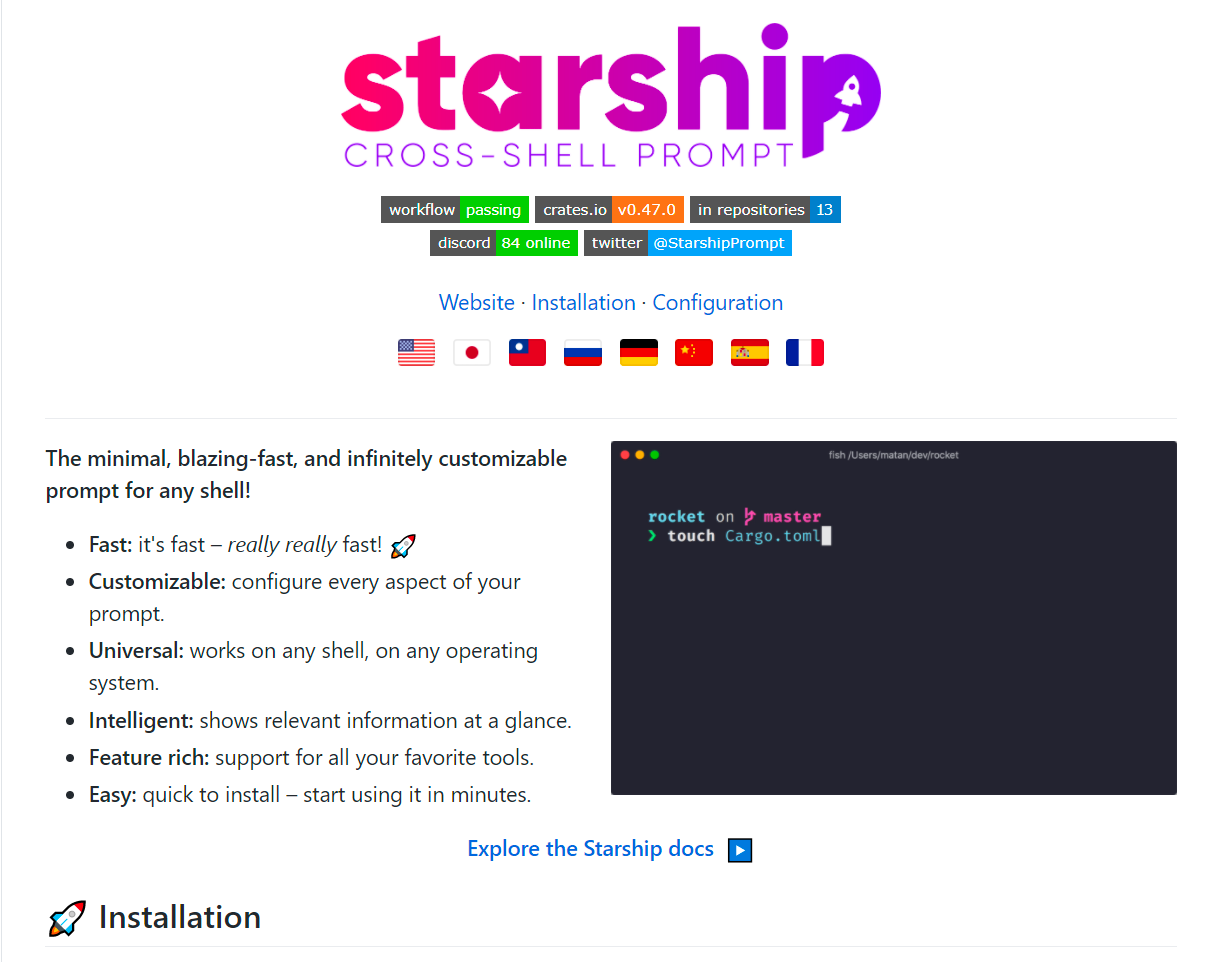
Look at the Starship prompt.

They have a table with 2 columns but without borders. In the left column is the list of essential features. Each feature is bolded with a short explanation.
- Bold feature: I am explaining the feature
And in the right column is a gif showing how the program works, preferably detailing the features mentioned.
To create a gif of a CLI app, use Terminalizer. Clean up your terminal before you record, as it can look messy.
You can also use Asciienma:
- Install asciinema and svg-term-cli.
2. Record with asciinema:
asciinema rec demo.castThis records the session in the asciicast v2 plaintext file format.
3. Convert the .cast file to .svg with svg-term-cli:
svg-term --in demo.cast --out demo.svg --window --width 80 --height 22 --no-optimizeYou probably want to play around with width and height. --window adds a fake OS window around the terminal session. I found that no-optimize fixed some weird font rendering issues on my macOS.
When thinking of what features to show, do not show them all. Only show the features that the user wants to see. And in words that a user can understand.
X vs Y, Comparisons With Competitors
If your project is competing with a lot of other projects, you’re going to need to show the user exactly why they should use your project over the competitors.
Convincing someone to leave their current tool for yours is hard. Make it as easy as possible for them to see the advantages over their current tooling.
In The Lean Startup the author talks about why at the beginning of a startup we should focus on the early adopters over the average customers.
“The point is not to find the average customer but to find early adopters: the customers who feel the need for the product most acutely. Those customers tend to be more forgiving of mistakes and are especially eager to give feedback.”
The early adopters are those that wouldn’t mind switching out their current tooling for a less tested, less mainstream option if it means it has better functionality.
The only way to get the average customer to use your product is:
- No competitors must exist.
- Their current solution to the problem is extremely convoluted compared to yours.
Otherwise, your best bet is to appeal to the early adopters and overtime slowly appeal to the average customer as your project becomes more mainstream.
The easiest way to compare your projects to others is to include a table of popular features. Use statistics here. It’s harder to believe words than it is numbers, even if the words are just as truthful as the numbers.
For Ciphey we compared our program to our largest possible competitor, CyberChef’s Magic function.
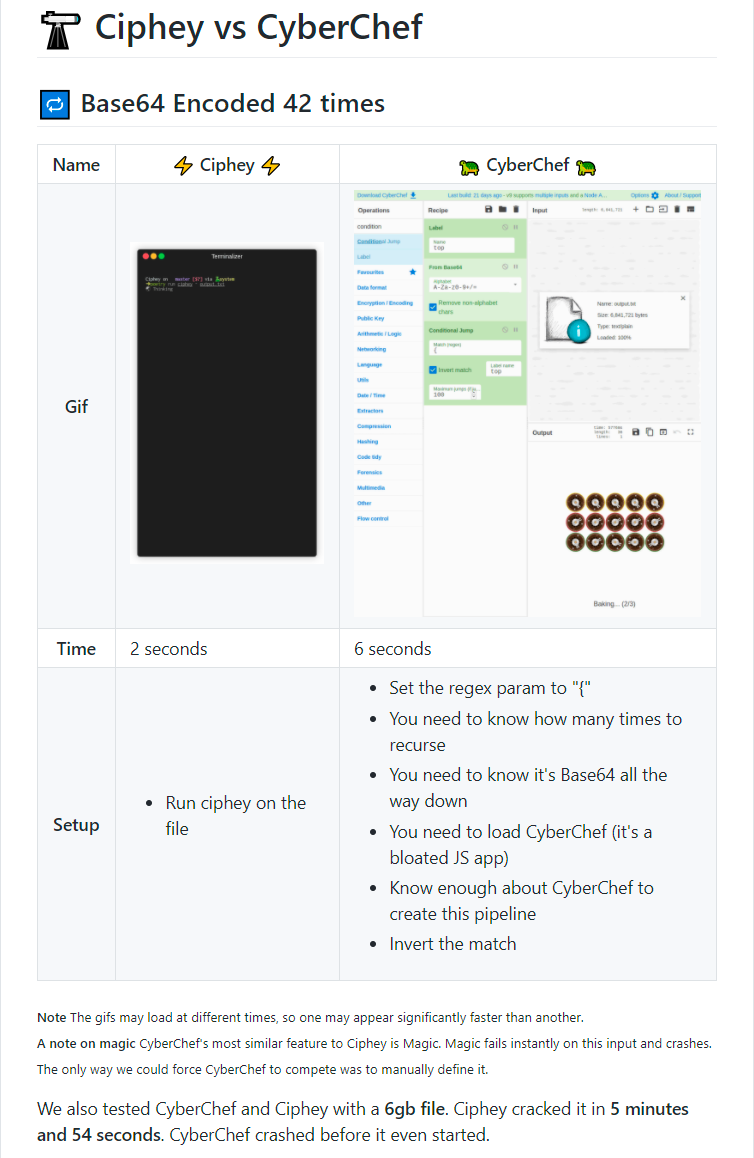
You can see we used gifs to demonstrate this. We explain how long each one takes and the setup of both, which can all be seen in the gifs.
We also leave footnotes on some things. Such as gifs loading at different times, the function (at the time) failing to decode.
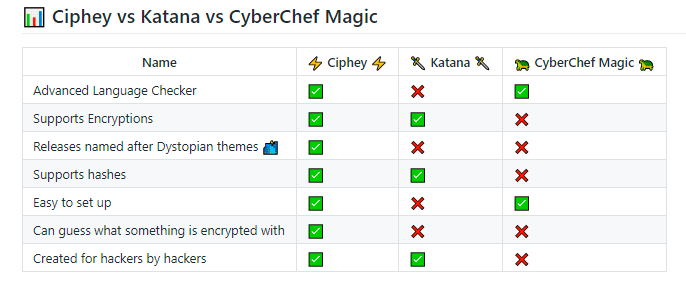
Later on, we compare again with a table this time of features.
Create Great Documentation
Do not put all your documentation into your README because:
- It’s harder to update.
- It’s harder for users to find things.
- It makes the
READMEunbearably long and ugly.
We don’t write all of our code in one file, why have all of our documentation in our README?
Don’t make the documentation section long. Since we have already explained how to install it quickly, we should show:
- How to run the program.
- How to find the documentation.
- How to find support.
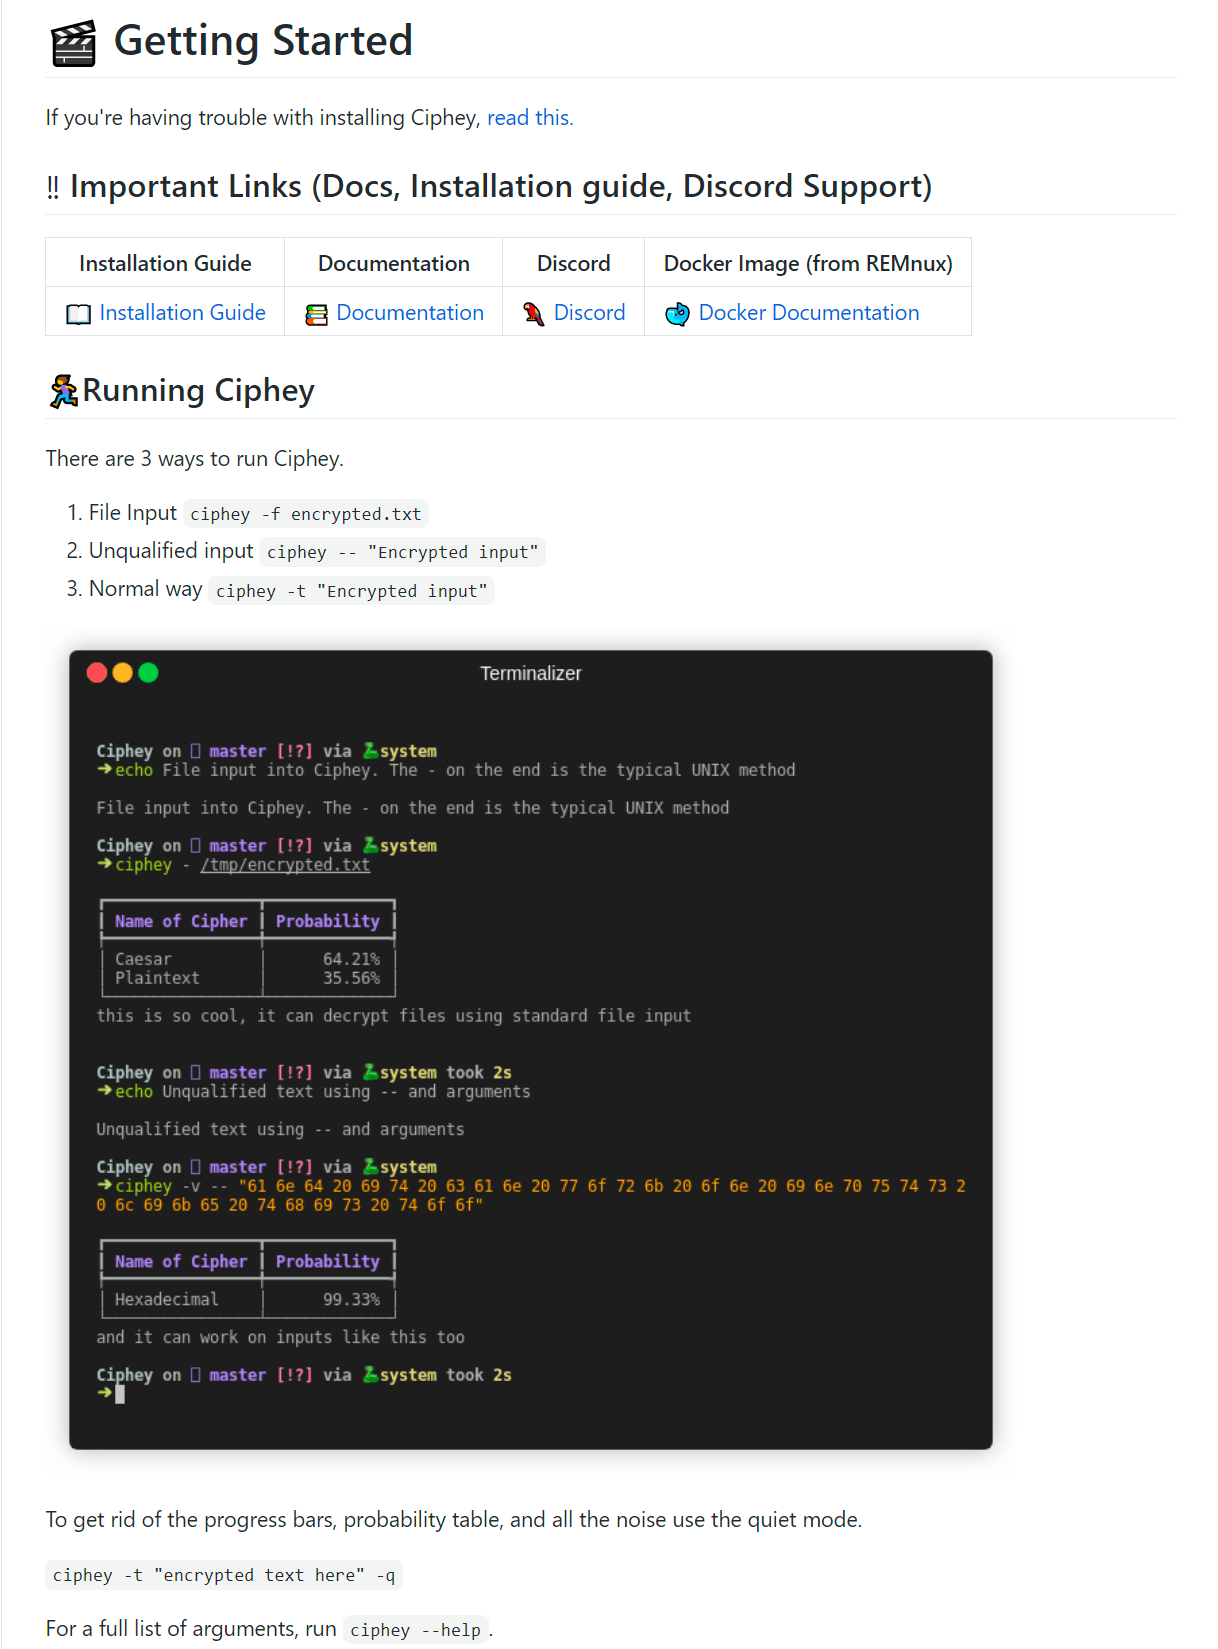
I included a gif here showing all the different ways there are to run Ciphey. Gifs are magical and easy to make.
Contributing, Thanking & Welcoming Contributors
The final section is about contributing.
- How to contribute.
- Thanking past contributors.
We need contributors to our project to fulfil the cycle.

Therefore, our README needs to display how to contribute.
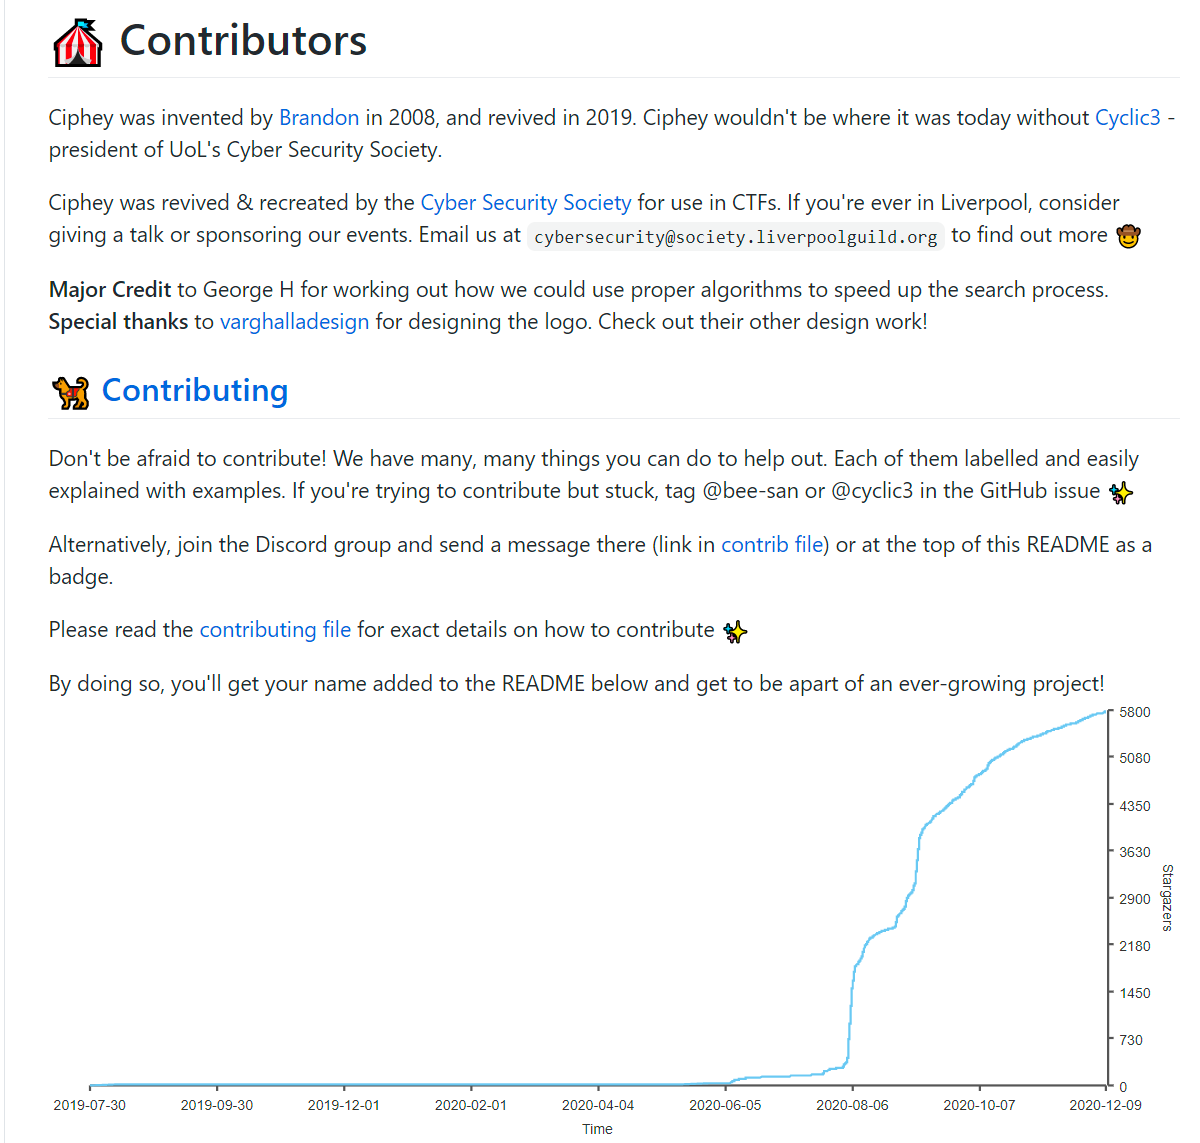

A short paragraph describing how to contribute, where to ask for help if they are stuck, the contributing.md file and any potential rewards for contributing (name added to the README and the chance to work on a growing project).
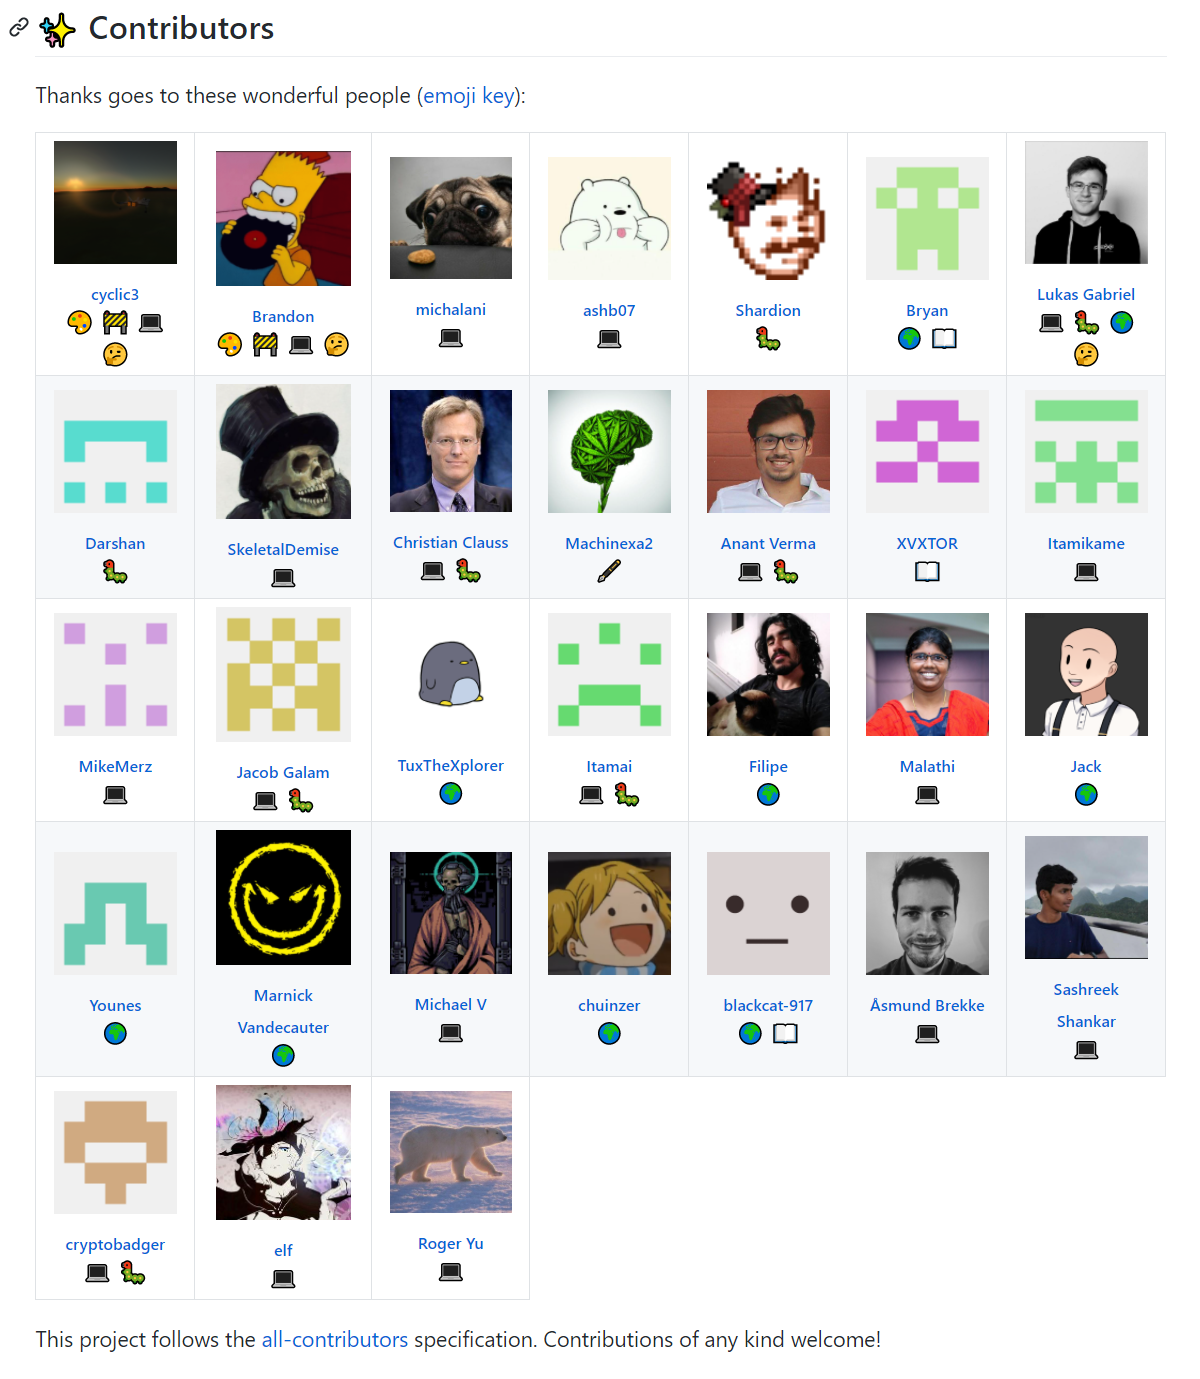
And then you want to thank your contributors. We use all-contributors which makes it easy to thank them. It shows their profile picture, a link to their websites along with emoji defining what they did.
Conclusion of Designing the README
Design is subjective and you may like something, or you may not. It’s down to you to decide on what looks good.
I hope the design principles I shared, along with the READMEs included here will inspire you to create something beautiful.
One thing I didn’t talk about here is creating documentation. It is your job as a programmer to create documentation. Your project is not done until it has documentation. You can use GitHub Wiki and DocStrings to automatically generate some documentation (you’ll still need to write documentation for installation, usage, etc).
Remember — the README is one of the most important parts of an open-source project (along with the documentation).
Creating Something People Want
A good README will get people interested, and a working project that solves their problems will get people talking.
This chapter is based on Zero to One by Peter Thiel, but will feature inspiration from other places.
“Every moment in business happens only once. The next Bill Gates will not build an operating system. The next Larry Page or Sergey Brin won’t make a search engine. And the next Mark Zuckerberg won’t create a social network. If you are copying these guys, you aren’t learning from them.”
Problem First, Product Second
For your project to grow, it has to solve a problem. It’s better to find a solution to a problem that people have rather than create a project for the sake of it.
Let’s compare 2 ideas.
- A recipe app
- A digital platform for artists to share their work, get feedback and start selling to gallery owners.
The first one doesn’t solve any problems. There are millions of recipe apps in the world and unless there is something truly unique it won’t take off.
The second one is a unique & novel idea that aims to solve the problem of:
“I’m an artist wanting to get paid for my work and improve.”
We have a problem, artists not getting paid, and we solve the problem.
Some people come up with the project first, but doing this means:
- We aren’t solving one specific problem from the start.
- We don’t have a well-defined target market.
- It’s likely already been done before.
As Walter Isaacson said in The Innovators:
“But the main lesson to draw from the birth of computers is that innovation is usually a group effort, involving collaboration between visionaries and engineers and that creativity comes from drawing on many sources. Only in storybooks do inventions come like a thunderbolt, or a lightbulb popping out of the head of a lone individual in a basement or garret or garage.”
It’s unlikely for our project to be innovative if we don’t solve a small problem first. In the same book, Isaacson says:
“Progress comes not only in great leaps but also from hundreds of small steps.”
Solving the problem will bring us closer to a unique & novel project.
Living With the Problem
You cannot solve a problem you do not have. In The Lean Startup, Eric Ries states:
“In my Toyota interviews, when I asked what distinguishes the Toyota Way from other management approaches, the most common first response was genchi gembutsu—whether I was in manufacturing, product development, sales, distribution, or public affairs. You cannot be sure you really understand any part of any business problem unless you go and see for yourself firsthand. It is unacceptable to take anything for granted or to rely on the reports of others.”
Unless you have the problem, you cannot effectively solve the problem.
It also helps with idea generation. Pay attention to the minor inconveniences in your life, in the lives of people around you and build products that solve those problems.
It’s a lot easier to observe the problems present in your own life than it is to generate random ideas that might work.
If you have a problem, you know 2 things:
- The problem exists.
- Other people have the problem.
The first point is important. Many people create solutions for problems that do not exist.
This product essentially injects the potato with oil and other foods. This problem does not exist. No one has ever had this problem. If you watch the video, you can see that the Potato Doctor cuts the potato open. What is the point? There isn’t one.
The second point is less obvious, but a good indicator. Humans are not unique. We mostly share the same problems. If the problem directly affects my life, I know that it must affect other people too.
Finding Problems in Communities
You don’t have to be the one to find the problem, others can too. If you pay attention to a community, these people will reveal the problems they are facing.
Listening to a community exponentially grows your rate of ideas vs being on your own.
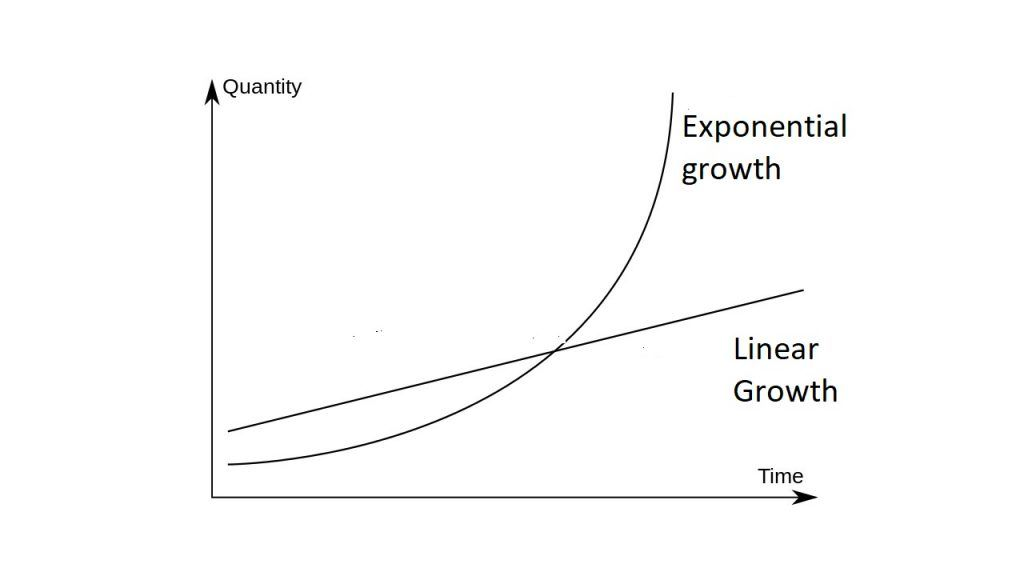
The more people there are, the more you listen, the more ideas you can generate over time compared to thinking on your own.
Build a minimal viable product that solves the problem the community is facing.
A minimum viable product, or MVP, is a product with enough features to attract early-adopter customers and validate a product idea early in the product development cycle.
Share with the community. Measure its effectiveness, learn how to do better and re-build it (or add more) to improve upon it.
Over time, it will eventually leak out of the community into other similar communities.
You have around 2 weeks before you lose motivation to work on something. Create the smallest possible minimum viable product that the community can use. Their thanks, if provided, will give you the motivation to continue working on it.
Solving the Problem Well
Here’s the thing.
- You have a problem you can solve.
- You have a community that’ll help you solve this problem and provides feedback.
But that doesn’t mean your problem is solved well. Take a look at Juicero. Juicero solved a problem that many people have.
We want to create our juice drinks, but to do that we have to:
- Buy Fruit & Vegetables.
- Wash them.
- Cut them.
- Juice them.
- Clean up.
Juicero’s solution was to (ignoring hardware):
- Insert packet into Juicero to get the juice.
This is a good idea, but it was poorly executed.
There are many talks about why Juicero failed — all out of the scope of this article.
The point is that you could have a great idea, but if it’s poorly executed it may have too many downsides to be used as the solution.
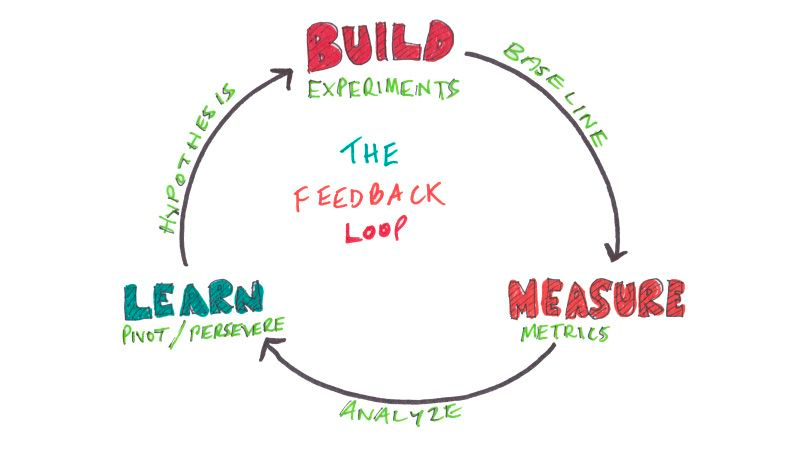
The way to solve this is via the minimum viable product loop. Instead of spending 3 years creating a project, we release it as soon as possible, gather feedback, improve and loop.
We are continuously heading towards what people want, and each iteration will solve the problem better than the last. If it doesn’t, the next iteration we solve the problem differently and so on.
Getting the Word Out
If we never show off our project, why would we expect anyone to see it? It’s not good enough to build it and hope they come. We have to get the word out.
The good news is that if you’ve been following along in Creating Something People Want we already have the word out. The community we are in know about the project and use it.
That helps us immensely. Going from 10 GitHub stars to 100 is easy. Going from 0 to 1 is hard.
Once we get a few stars we will get more stars. Stars beget stars ⭐.
Sharing With a Community
If we have been following the Build, Measure, Learn loop and regularly publishing minimal viable products then we will already have the word out in our community.
When it comes time to publish, make sure your community knows that it’s the first real release. They’d be more likely to share with their friends this way.
News Aggregators
Your next port of call is news aggregators. These are places that collate news. You should post to:
- Subreddit of your choosing.
- HackerNews.
- Lobste.rs.
Do not read the comments. Those places are incredibly toxic and can’t see a good product even if it hit them in the face.
Awesome Lists
An Awesome list is a list of awesome things about some topic. There are lists such as:
- Rust
- Python
- Hacking
- Web
And more.
Find some lists that apply to you and submit PRs. In the worst case, they don’t accept it.
GitHub Trending
If all goes well, you should hit GitHub trending at some point. This will provide monumental traffic.
Once you hit trending, pay attention to social media and thank anyone that shares your project. If they follow you they may re-tweet your project again in the future.
This is the snowball effect. You need about ~50 stars to hit the trending page for your language, ~100 stars to hit the overall trending. Once you do this, trending will give you more stars and it will continually snowball.
Leverage an Existing Following or Past Popularity
The easiest way to gain stars is by leveraging your existing following. Post on social media, other GitHub repos and the likes.
Conclusion - Throw the Rule Book Away
Like all things, this is not an exact science, more like art. And you can’t become good at art by following other people's guidance. You’ve got to discover your unique style.
The Mona Lisa was painted once, but the thousands of people that painted the Mona Lisa afterwards were never recognised.
I suggest you throw some of the rules away, and experiment yourself. Create new rules and understand what works for you.
What works for me, won’t necessarily work for you. So go ahead, throw the rule book away!
Let’s go over some things we learnt.
- Well-designed READMEs are essential.
- Creating something people want.
- Get the word out there.
- Discover your unique style and what works for you.